When building APIs in .Net apps, I have been using Swagger UI auto generated API docs for a few years now, so I was happy to hear they were now "out of the box" with .Net 5 WebAPI.
Let's start off by discussing OpenAPI & Swagger UI. Looking at the Microsoft docs, they give the defintion: "Swagger (OpenAPI) is a language-agnostic specification for describing REST APIs. It allows both computers and humans to understand the capabilities of a REST API without direct access to the source code". As a developer who integrates with APIs built by others and builds APIs of my own, in my experience good docs can make our experience on a project so much better! In the past, adding Swagger docs to WebAPI project was possible by installing the Swashbuckle package, but now with it being the default I hope it encourages developers to think of good docs as a must have when building APIs.
Let's have a look at creating OpenAPI docs in a .Net 5 WebAPI project...
---------------
We can create a new .Net WebAPI solution using the default templates with :
dotnet new webapi -o CaroleExampleApp
or we can go via Visual Studio "Create a new project" ->"ASP .Net Core Web Application":
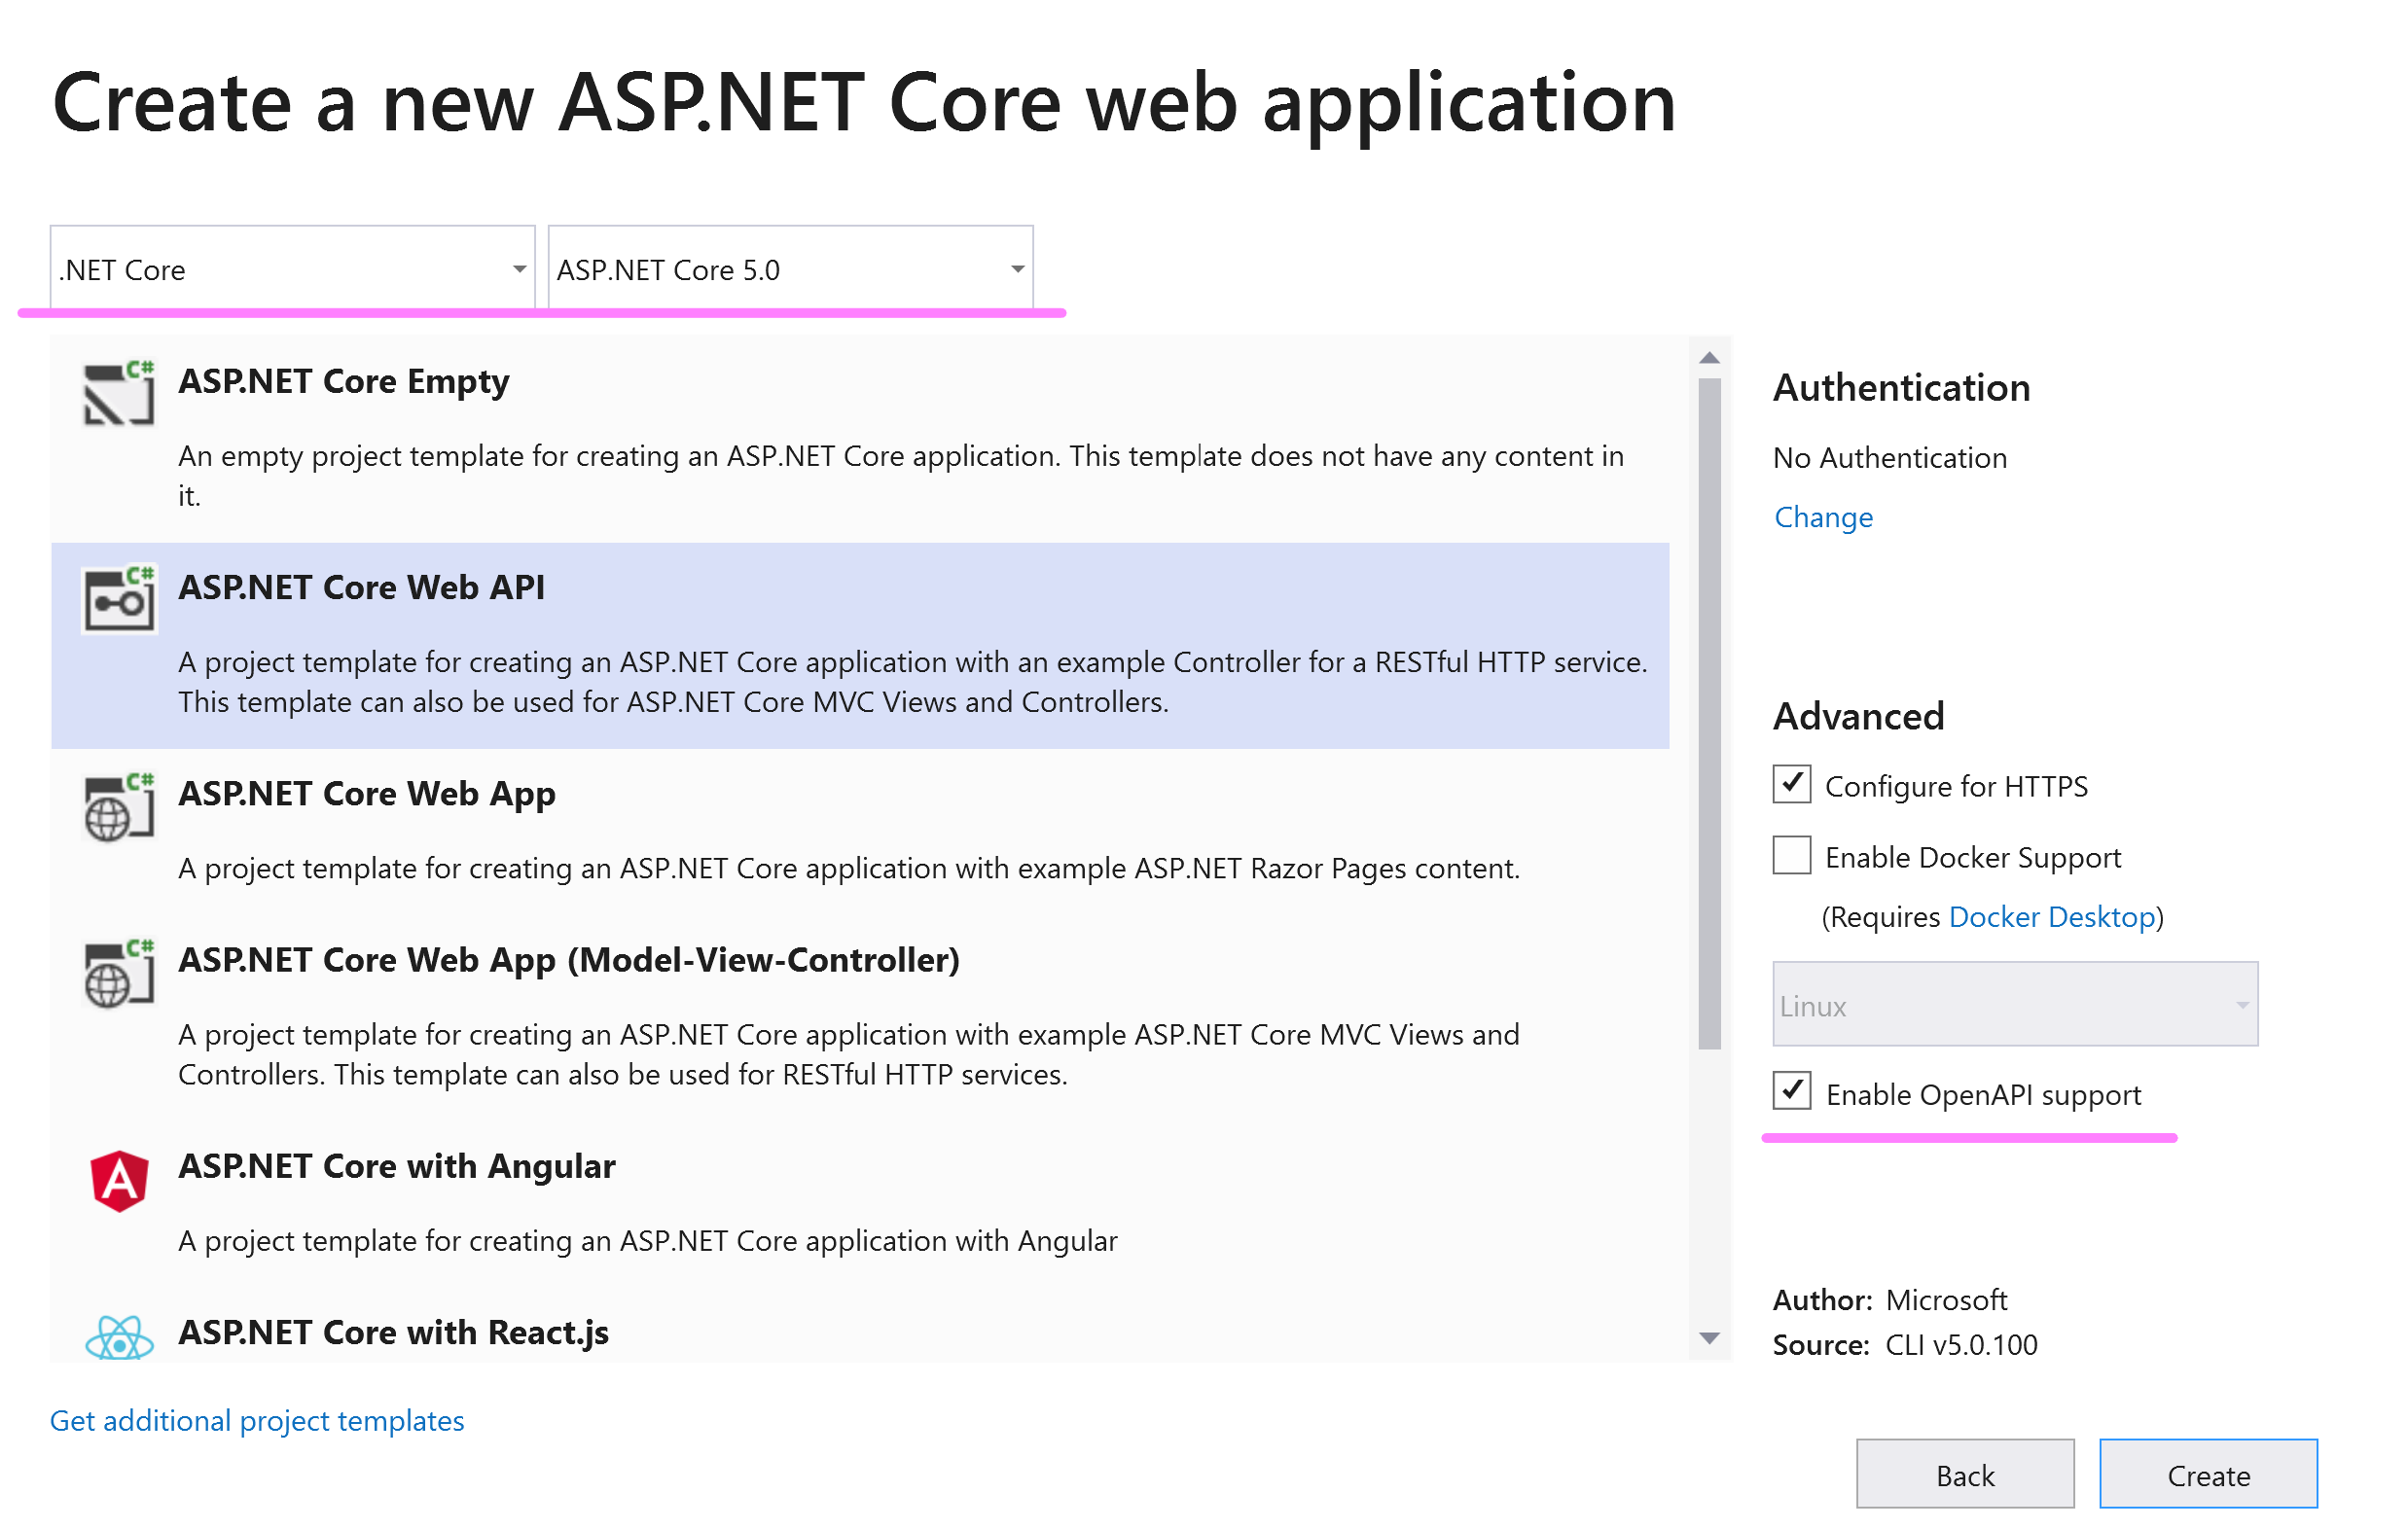
You will notice (see pink underline annotation on the screenshot), that when in .Net 5, we get the "Enable OpenAPI support" option is there and ticked automatically. Leave this ticked and create your solution. If you chose to use command line, it will be automatically added.
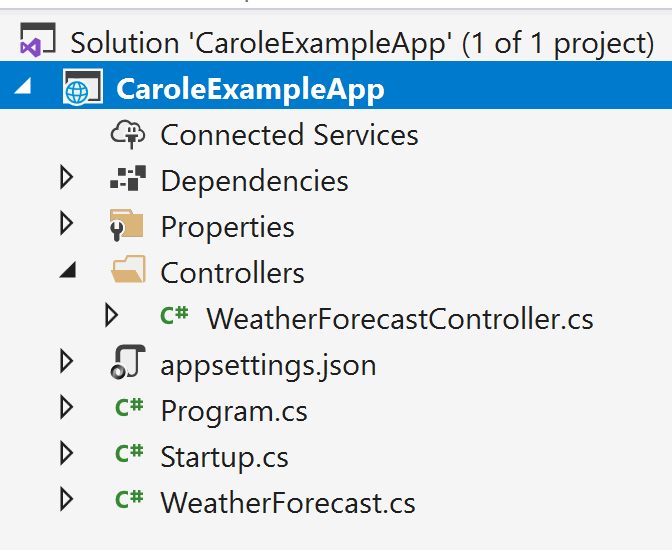
Looking at the file structure that's been created, it will look very like usual WebAPI projects we've created previously, the example given is a Weather Forecast API. If this is new to you, have a look around, particularly the WeatherForecastController.cs as this is the API endpoints for this example. So let's have a look in the Startup.cs to see how the Swapper UI API docs are set up.
This file is doing everything we need it to on startup to set up WebAPI, routing, etc but let's focus on the OpenAPI config specifically. You'll see on line 24, we configure Swagger OpenAPI docs and on line 37 we configure the UI which will allow us to have our front end to access the docs, which we'll show soon.
If we run our application (click the run with IISExpress button in Visual Studio or run "dotnet run" in command line in the folder your solution is in). Your a browser will open on the UI, on /swagger/index.html and you'll see our lovely API docs!
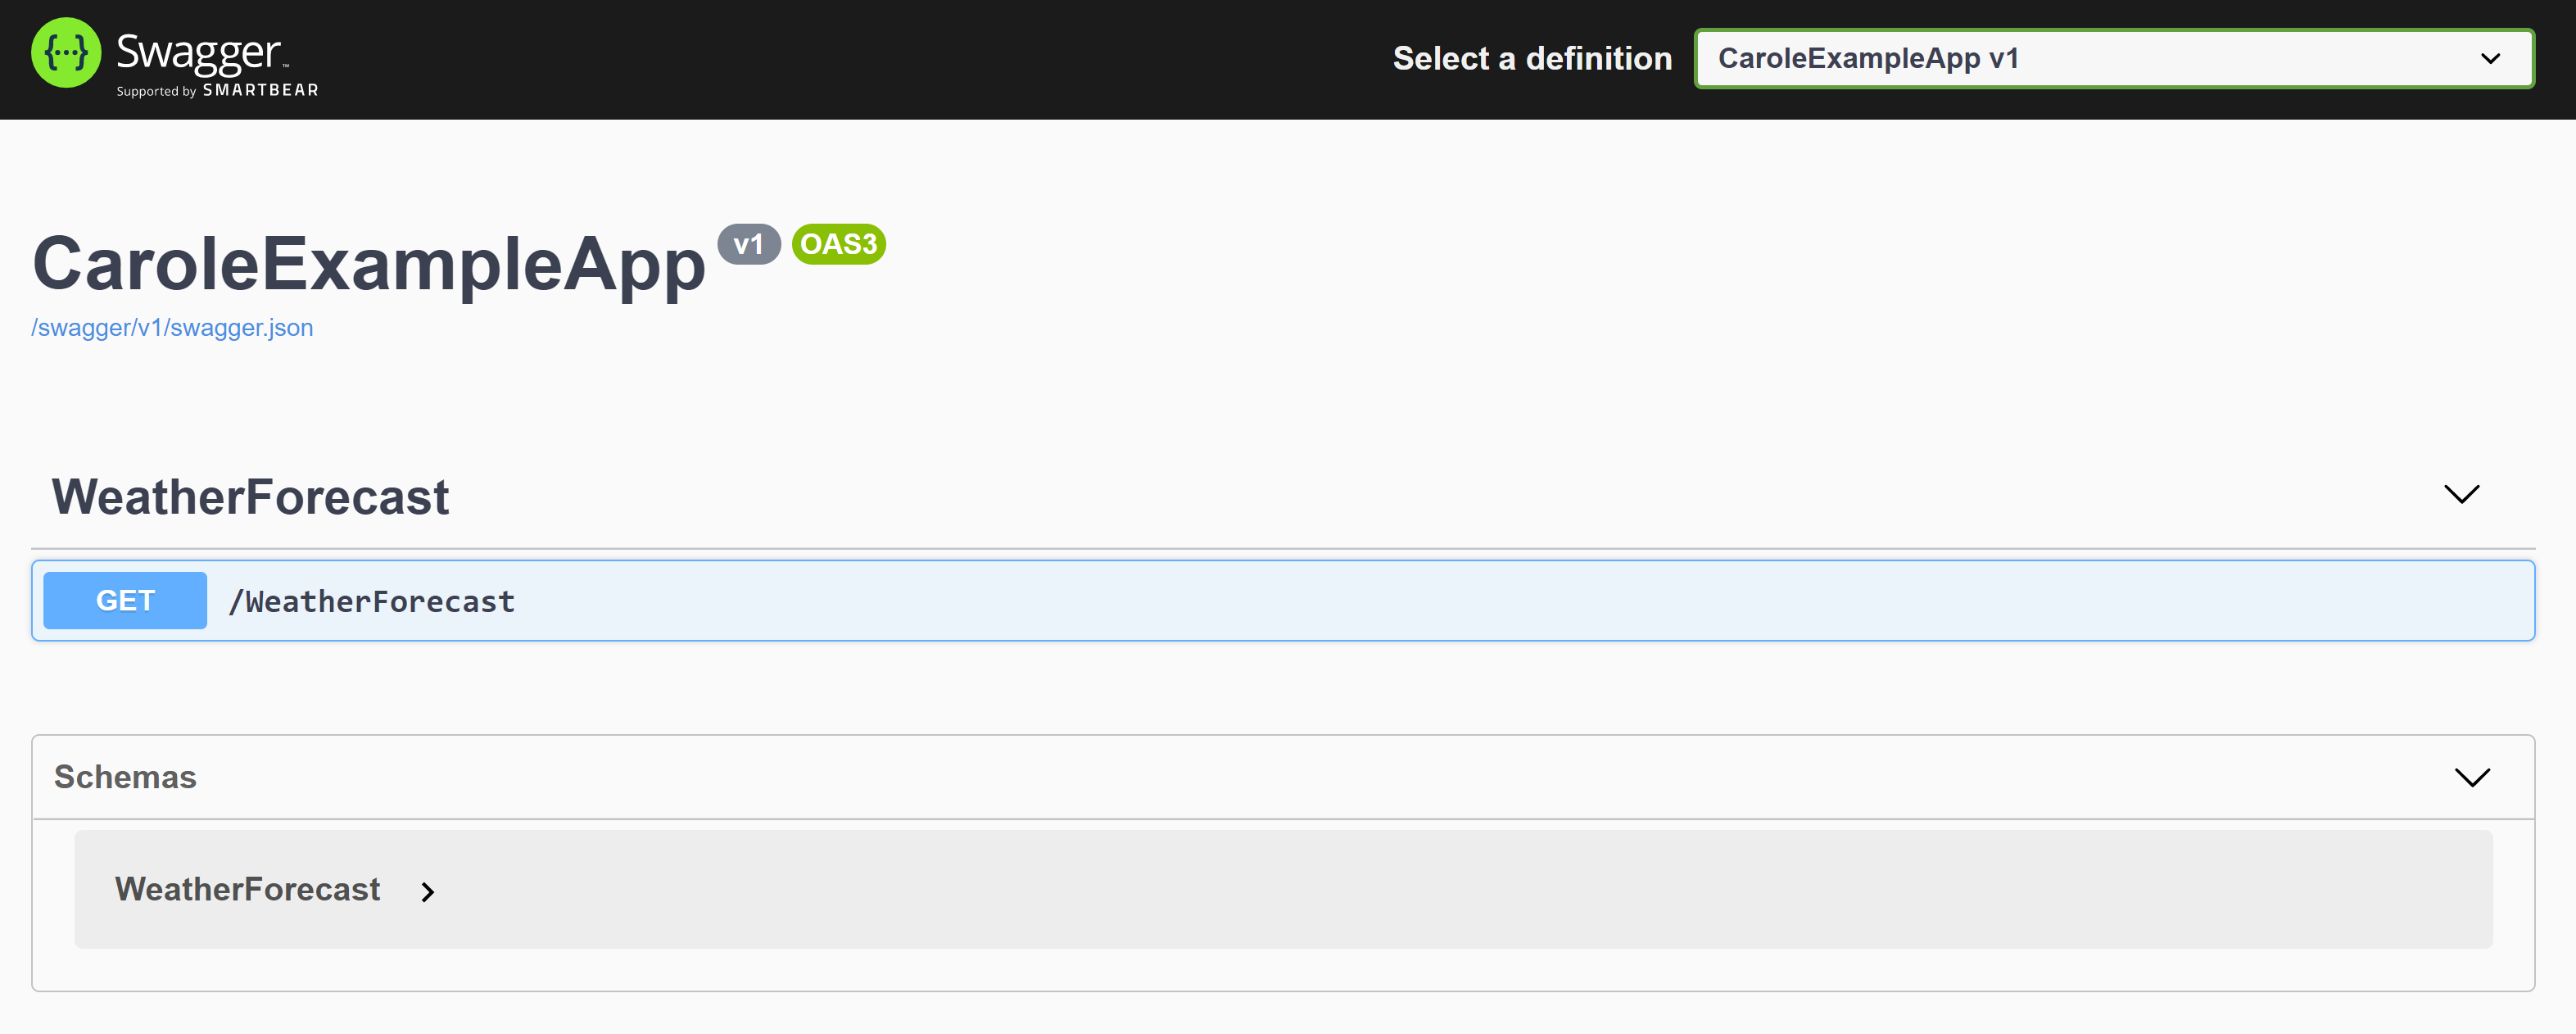
You can see the Get method on the WeatherForecastController is now there in the /WeatherForecast route! Have a wee click around and see how the docs look if you haven't used SwaggerUI before, it's really useful to see parameters APIs take and the responses they return too.
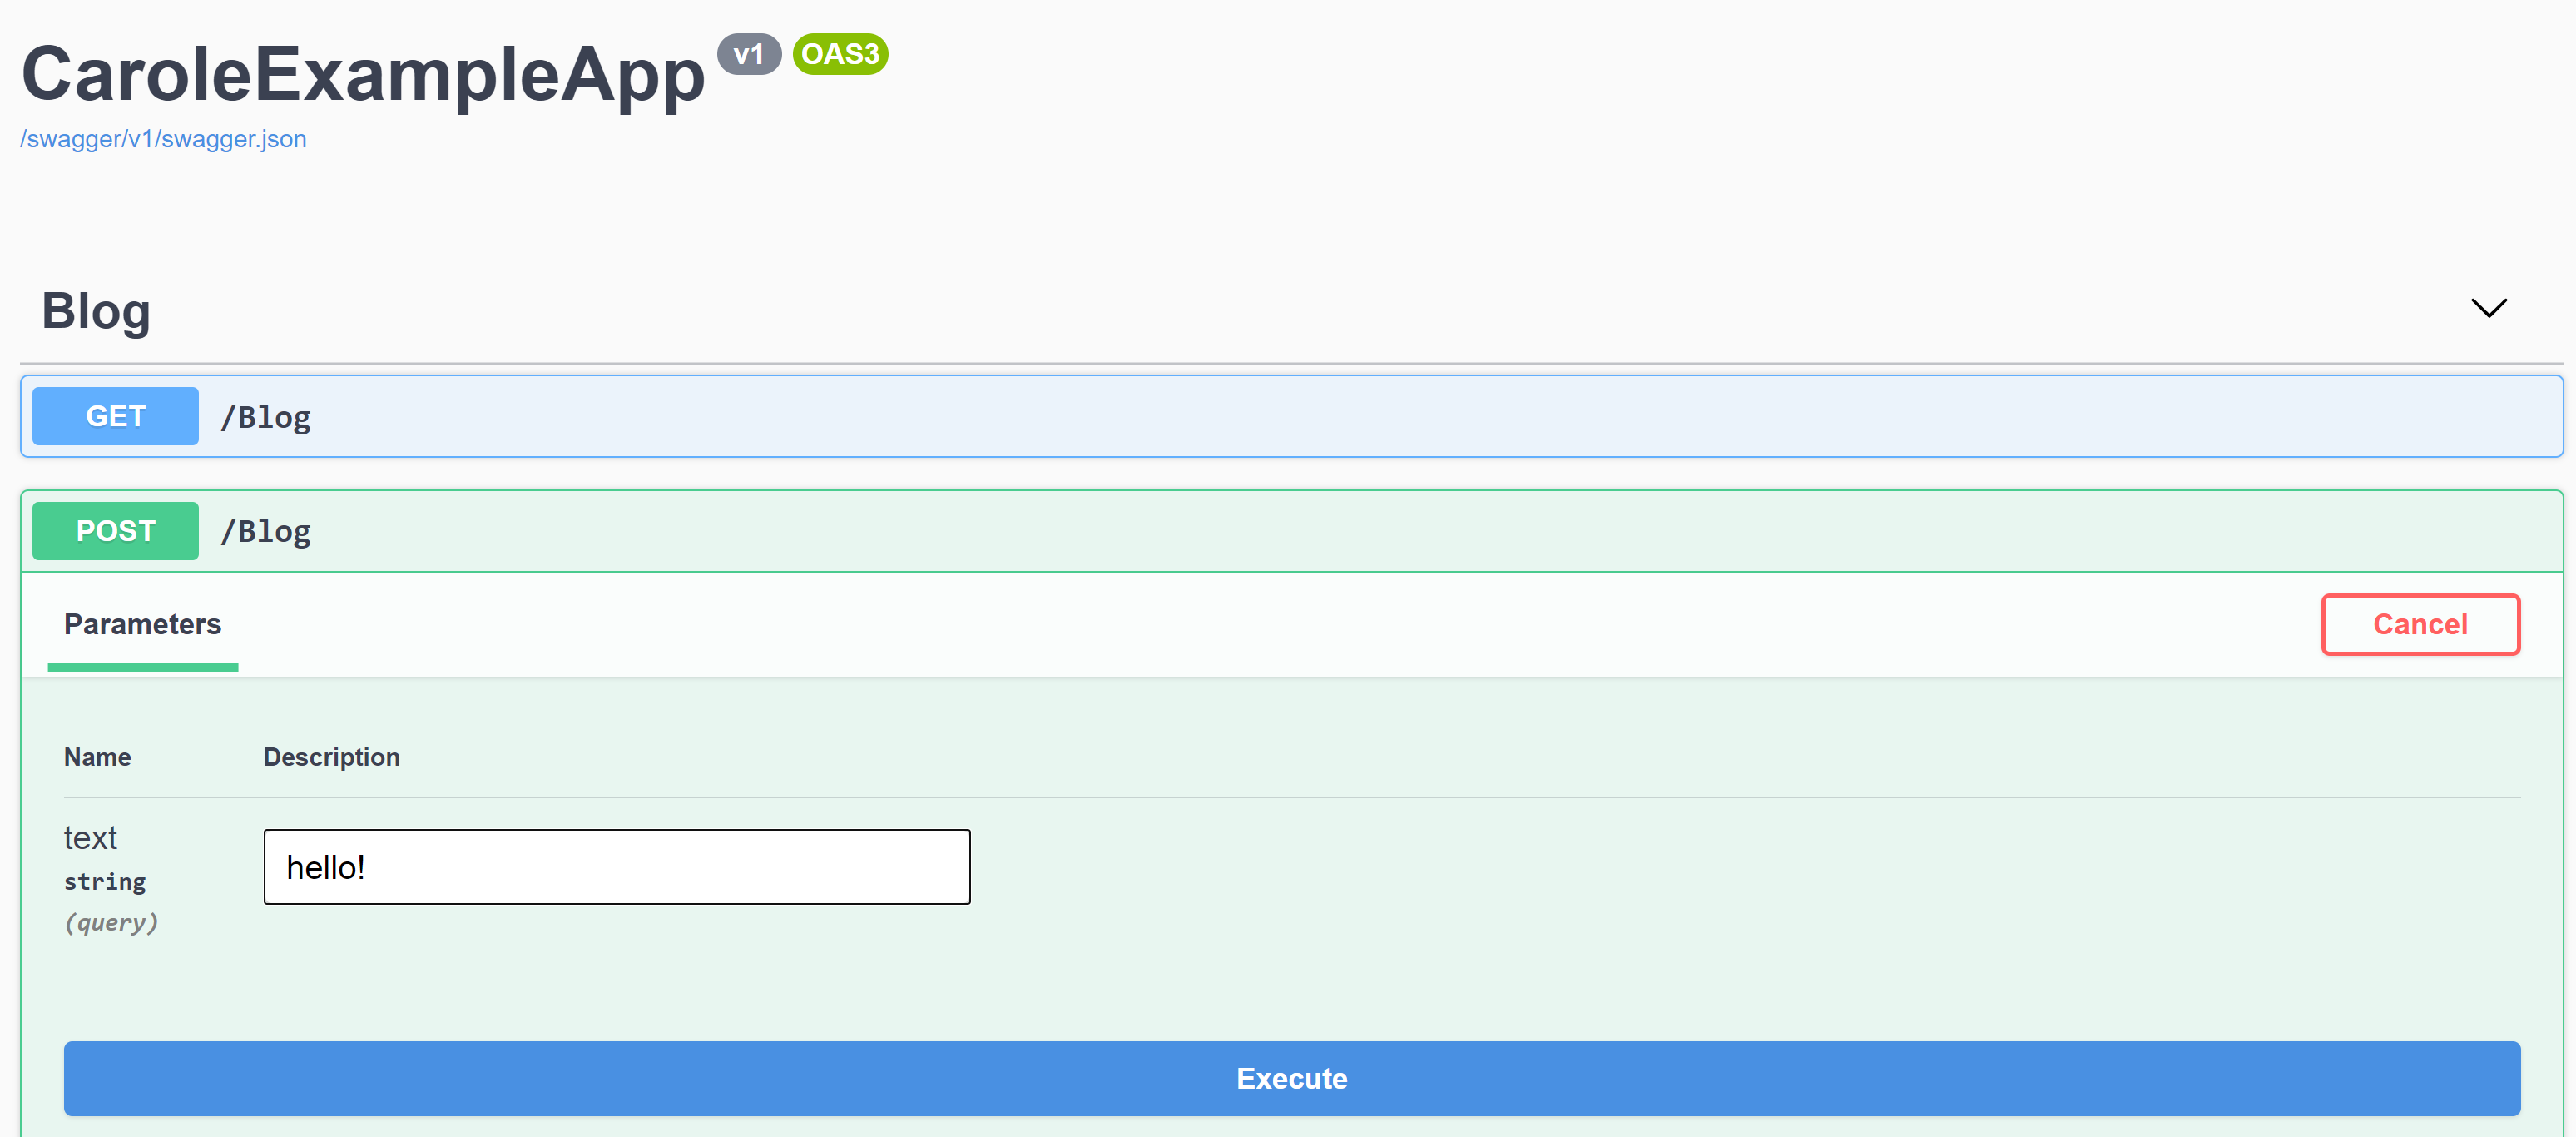
Now, what if we have more API end points? Let's have a look. I will add a file BlogController.cs which has a very simple(and not very useful!) set of APIs, a GET and a POST.
Now if we rebuild and run our app, in our Swagger UI we have our /Blog end point with both a GET and POST. If you expand the POST item and "try it out", you can see you have the option to give test input parameter as we defined in our API.
When I navigate to /swagger/v1/swagger.json, I can see how the OpenAPI docs have generated a .json file to represent my APIs (this is what the SwaggerUI uses to know what to present on the UI).
And there we go, we have wonderful, developer friendly documentation of our APIs with no extra effort!
I hope this was useful, as always let me know on Twitter.
Related Posts