In this post I will show how to create your first playwright tests in just a few minutes!
In my last post, I mentioned at the hackathon I learned a bit more about Playwright. I thought I'd share a how to get started 👩💻
What is Playwright?
Playwright is a end to end testing and automation framework that works cross platform, on many browsers and can be written in several languages. This makes it flexible to developers and testers across many tech stacks!
Playwright team themselves describe it with "Playwright enables reliable end-to-end testing for modern web apps". With the focus on web, there is inbuilt ability to access shadow DOM and run out of process, giving it an advantage over some other tools.
How to set up Playwright
I used the Playwright docs, which give a few ways to use Playwright. I used npm command and selected Typescript tests. See command line screenshot below to see the options:
npm init playwright@latest

This creates a sample project with several files & folders:
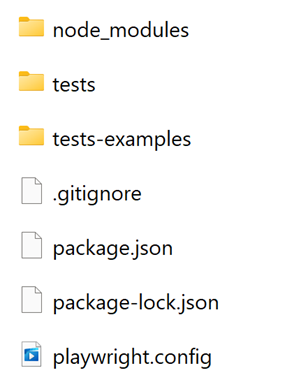
The playwright.config.ts has the configuration for your tests, you can edit most of the test configurations here including browsers. Check out the docs.
Running tests
You can run the tests using this command:
npx playwright test
You will see an output in cmd the number of tests and if they pass or fail. If you want to see a report generated in HTML, you can run:
npx playwright show-report
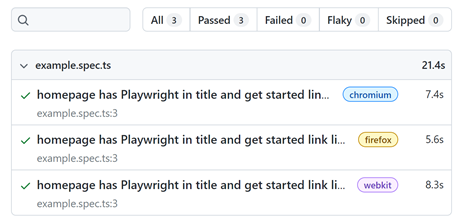
Here is the report for the auto generated tests:
Writing tests
Now we have set up and seen how to run the tests, let's have a look at how to write tests! Jump in to the /tests folder and the example.spec.ts file.
The import line makes sure we have access to playwright:
import { test, expect } from '@playwright/test';
The test is contained in the following block where you can edit to name it as you'd like it to appear in your report ("Carole.dev playwright test" in my example).
test('Carole.dev playwright test', async ({ page }) => {
...
});
Inside here, you can have your tests. A really simple example for this blog shown below:
await page.goto('https://carole.dev/');
await expect(page).toHaveTitle(/CRL/);
This will run a test to go to my homepage and check the page has title "CRL", which at the time of writing it does.
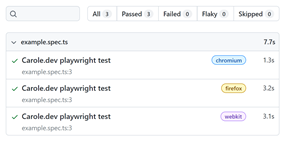
From here, you can add more tests. See docs. Now, we can run the tests using npx playwright test again and view report showing the tests pass.
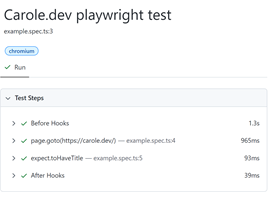
You can click on one to see details of each test step. This will be particularly useful when tests fail!
There we go, we have setup, written and run some simple tests!
Next post, I will share how to use the codegen test tool for Playwright!